Making Headway

The only changes I made to the design were following its original angle at  the overcab back 3/4 of the length of the structure. This created A LOT more head room and will hopefully make it easier for snow to slide off, a situation I hope to find myself in with this regularly. Here’s a couple preliminary design ideas.
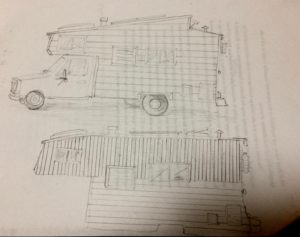
I ended up sort of combining the two designs, taking the roof line from the top drawing for previously stated reasons and using two materials transitioning at the window/overcab line like in the bottom design. The use of multiple materials was mostly due to concerns about weight and partly concerns about not having enough material to run redwood all the way up. I had originally thought to use reclaimed corrugated metal roofing but that stuff is rather hard to come by at a reasonable price and the logistics of placing windows and doors as well as how it would look with a metal roof eventually lead me to abandon that idea.

Instead, when I found a guy through OfferUp selling a gorgeous (albeit heavy) 2′ x 4′ skylight for $20 that fit my vision of staring at the stars from bed perfectly, he also happened to be selling just enough square footage of unused off-white cape cod shingle looking vinyl siding to cover the top half of the rig. When I got it home it matched the cab paint perfectly… and at the cost of only another Jackson it was perfect. Lightweight, kitchy, easy to cut and assemble… too perfect!

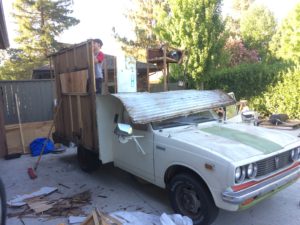
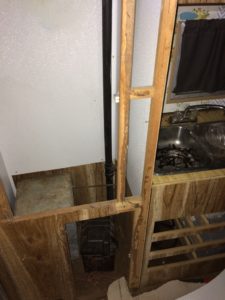
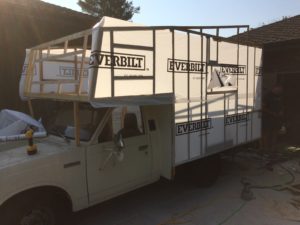
But first, I still had to build the walls back up which, as most things with this project, proved to be more difficult that originally expected. However, using the previous framework as a reference made the work go faster and with a little help from family and friends we had a “tiny house truck” raising and got all the walls up, stapled and screwed them together and before a stiff breeze had the chance to blow all my toothpicks away we wrapped it up in moisture barrier.
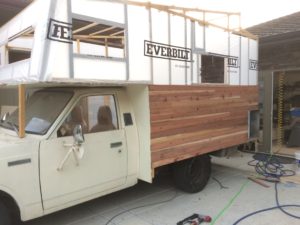
The next step was stacking the wood strips I had ripped out of old redwood decking against the bottom half of the bae. It was at this point the fruits began to look like they might bare as I began to see the image I had held in my mind for nearly a year become real before my eyes.
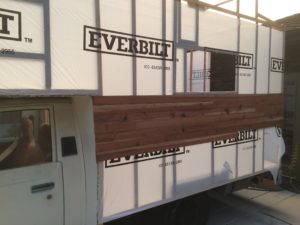
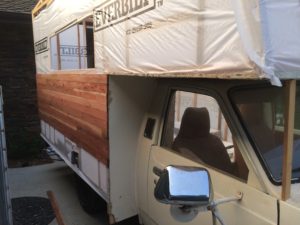
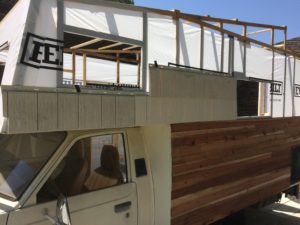
with both sides and the rear planked up it was time to get this eyesore off my boss/friend’s driveway before the HOA started fining their asses. I owe him, his wife, and their whole family a huge debt for all the help that they’ve given me with project and innumerable other instances of graciousness, I doubt I’ll ever be able to repay it. Before I made the drive I had to snap a quick shot of a couple vinyl siding pieces dry fit to see how it’d look and I must say, not too shabby for a truck shack.
Big Changes

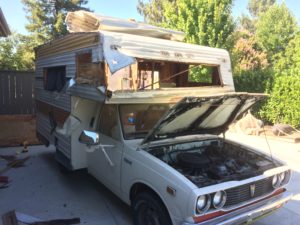
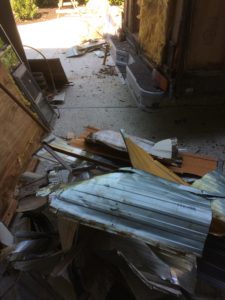
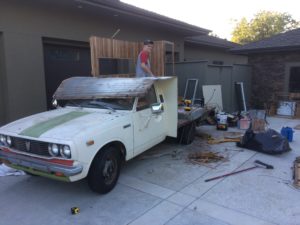
It was a long time coming but I finally got the opportunity to take the siding off of the ol’ girl. I had hoped to save some of the aluminum and maybe reuse it, but it was nearly impossible to remove and keep in decent condition.

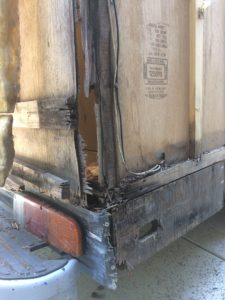
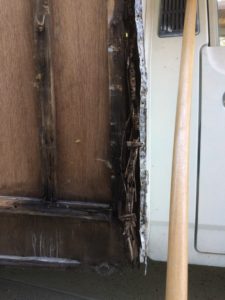
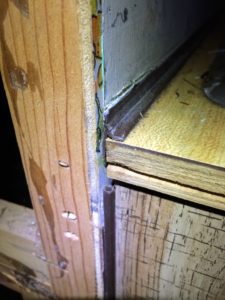
I had expected there to be some rot inside the walls however I hoped to keep the majority of the framing intact while simply replacing the worst pieces. I very quickly (and unhappily) realized this would not be possible.

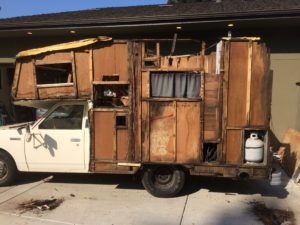
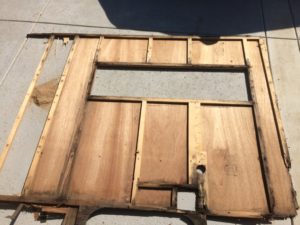
The amount of rot was biblical. One of the previous owners had replaced a critical framing connection with expanding foam and covered up just about every other area that showed signs of water damage. Thanks for the fixes. So at this point it became clear there was nothing left to do but tear it all down and rebuild from scratch.

Thanks for the help Sis!

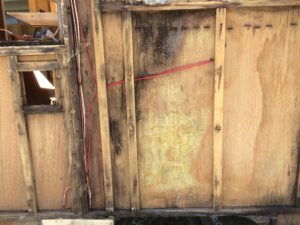
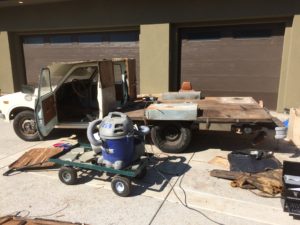
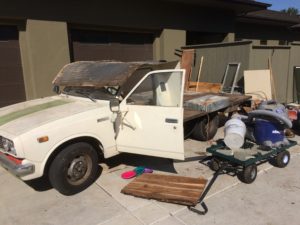
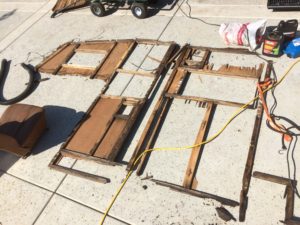
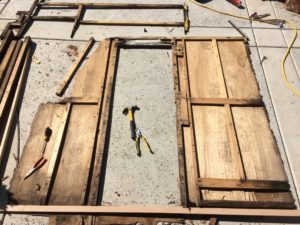
After much toil and skirmishes with a gang of yellowjackets I had gotten all of the old framing and inner walls removed. There was definitely something satisfying about seeing the holiday stripped down to its foundation with the simultaneous paralyzing fear of “holy s**t what have I gotten myself into”. No turning back at this point though, buy the ticket take the ride. I did have the foresight to try and keep the walls intact as they were removed since I planned to imitate the majority of the previous structure I could use them as templates and make my modifications where I desired, namely adding headroom.

Sitting and Waiting

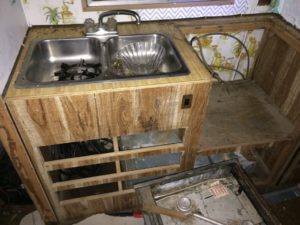
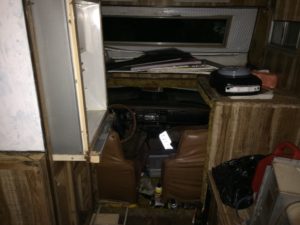
Once purchased, this eyesore sat and sat for nearly 9 months, partly because it was the wettest winter for the area in the last decade and partly because we were expecting and eventually welcomed our beautiful baby girl, Miss Nyla Moon. I had hoped to work from the inside out but over that 3/4 of a year I struggled to remove any of the interior structural aspects. I found that nearly all of the fasteners holding the cabinets and walls in place had been installed from the outside. Instead, I removed all of the cabinet doors, drawers and appliances, demoed what I could and studied, putting the structural remodel aspect on the back burner.


I instead went to work on some of the mechanical aspects of the vehicle. After all, it doesn’t matter how nice it looks if it can’t reliably get you down the road.

After driving this spit-heap a mere 95 miles from where I had purchased and tuned it up to where I am attending university, I realized it handled like a bowling ball on a sheet of ice. So the first thing I did was replace the front and rear shocks upgrading to coilovers in the rear. I thought about adding a leaf spring kit but decided I’ll wait to see how it handles at final weight.

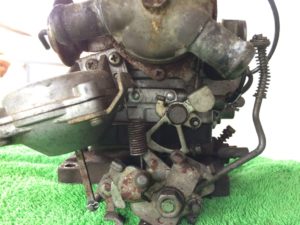
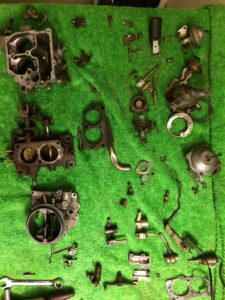
I then took on the daunting task of rebuilding the carburetor. I just watched a handful of Youtube videos, bought the kit, then set up a clean organized work area and dug into it.


Everything went reasonably/surprisingly well, until install when I didn’t get a good enough seal to keep the coolant out of the intake manifold. It ended up being due to my using the wrong pair of gasket set in the kit so when I swapped in the other pair I used a little liquid-gasket around the more critical areas just to be safe.

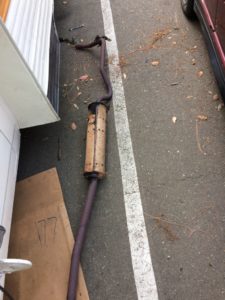
I then took on the exhaust system. There were numerous holes in the muffler as well as an entire weld separating, a random piece of pipe flanged in where the catalytic converter should be and everything else was just sad and ugly.


I replaced the muffler with a new one for less than $40. I cleaned up the pipes as much as I could and then painted them with silver exhaust paint and it really made a huge cosmetic difference. The catalytic converter was the hardest part, The one for my ’78 Toyota Pickup that had flanges and was up to Golden State (California) standards was about $280, which caused me to grimace the three times I ordered it just to find out after being charged three times that it was no longer available. But all things for a reason, I ended up buying a “weld in” version of the same catalytic converter for only about $120. And it just so happened my job at the college manufacturing lab taught me to weld and allowed me access to top of line machines for the benefit of added practice so I fabricated flanges out of scrap steel, welded them on and bolted it in with standard flange gaskets.

Still more to do, like replace exhaust manifold gasket, inspect/repair/paint exhaust manifold itself, check lash and bushings of valves, replace oil pan gasket and 1970’s points distributor to electronic distributor

The Journey Begins

I love the road. More especially I love living on the road for extended periods of time; and even more than that, I love having a place of my own to bring with me. Growing up I was lucky enough to enjoy a Westfalia, Bounder (identical to the one in “Breaking Bad”), Toyota Dolphin and lastly a Dodge Econoline conversion with a Jayco tent trailer in tow. That was the last rolling-home rig we had and it’s the one that hauled us along on my family’s transcontinental road trip, an adventure that took us through 28 states, lasted 10 months and the rest of my life.

My parents took my sister and me out of school, put us in the back seats and hit the gas. I was 7 at the time. We proceeded to live at campgrounds, learn school lessons at picnic benches surrounded by trees, meet people from all over and visit so many incredible places. I saw Yellowstone, The Badlands, Niagara, the Twin Towers, Autumn in New England, Washington D.C., I even saw it snowing in the high desert of New Mexico which was completely mind blowing for a 7 year old boy from Southern California. But the best part about the whole things was that the entire time I was at home and with my family.

That is why I have embarked on this incredibly foolhardy undertaking. I am now 27, starting a little family of my own, and I want to create amazing memories of the road for them too. I want us to meander along the rivers of asphalt and concrete that weave throughout this amazing land, and what more I want them to feel at home while we do it. The biggest problem is that motorhomes never really look or feel like a home.

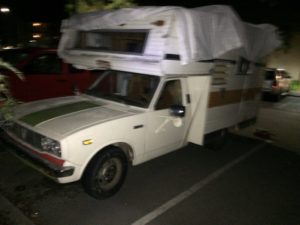
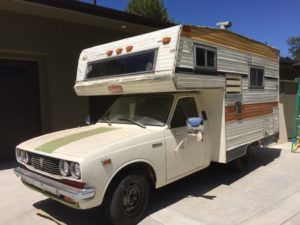
I am a big fan of the Tiny House trend that has been blowing up over the last few years (though it’s always been around) and how this attention has brought a lot of creative thinking, innovation and mass acceptance to the scene. With this in mind, as well as the countless conversions that have come before, “Some Turtles Have Nice Shells” being a huge source of inspiration, I am setting out to build “My Tiny House Truck” out of a beat up and left for dead 1977 Toyota pickup with a Royal Holiday camper that was slapped on it around the same era.

The 4 reasons why I chose this vehicle, in ascending order:

  1. The cab looks cool
  2. When it’s running right it should be getting in the high teens for mpg
  3. I’m familiar with the engine (20R & 22R are all I’ve worked on)
  4. I was able to get it for $500 because it wasn’t exactly running

After putting in two days and under $200 into a mild tune-up it is purring like a kitten. Now I’m not saying that’s what’s always going to happen, far from it, but I know this engine and I had a good feeling it just needed a little love, but I also knew that absolute worst case I could pick up a replacement engine for less than $1000. A simple tune-up and carb cleaning has gotten it from hardly starting/spastic idling to firing up on the first key turn running at about 80%.

Next I plan to gut the living space and see what kind of framing is in there and how bad the mold situation is. I expect to tear it all the way down to the axel and put in all new subfloor, but also try to reuse as much as possible like windows and appliances to cut down on cost and unnecessary waste. I also plan to use a lot of reclaimed materials from demo sites, Craigslist Free, Habitat and I already have a friend who said he might be able to salvage a lot of old redwood 2x6s from a deck he’s tearing out, like what Mark Rislove used to build his Hippy Shack which has been a huge inspiration to me.

No time to waste, no time at all.

Continue reading “The Journey Begins”